Table of Contents

Emergencies are unpredictable, and when they strike, they often leave homeowners scrambling for quick fixes to prevent further damage. One of the most versatile and essential tools in such situations is the tarp. Whether it’s a leaking roof, a broken window, or damage caused by severe weather, tarps can provide a temporary but effective solution.
This article will guide you through the process of using tarps for emergency home repairs, emphasizing the benefits of canvas tarps in particular scenarios.
Understanding Tarps: Types and Uses
Tarps come in various materials, including polyethylene, vinyl, and canvas. Each type has its strengths and is suited for different kinds of repairs. Polyethylene tarps, commonly known as poly tarps, are lightweight, waterproof, and UV-resistant, making them ideal for short-term outdoor use.
Vinyl tarps are heavier and more durable, suitable for longer-term applications. Canvas tarps, while not completely waterproof, are incredibly sturdy and breathable, making them perfect for covering furniture or machinery that needs to stay dry but also ventilated.
Emergency Roof Repairs
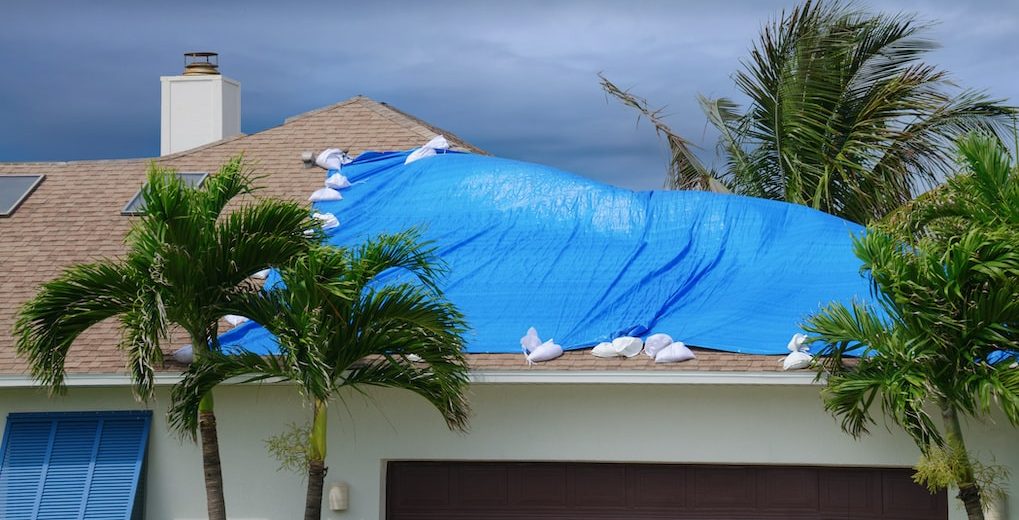
One of the most common emergency uses for tarps is to cover a damaged roof. Severe weather, falling branches, or even wear and tear can cause leaks, leading to water damage inside your home. Here’s how to use a tarp to temporarily fix a leaking roof:
- Safety First: Before attempting any repairs, ensure the area is safe. Avoid working on the roof during a storm or high winds.
- Assess the Damage: Identify the extent of the damage and the area that needs covering.
- Choose the Right Tarp: For roof repairs, a heavy-duty poly tarp is usually the best choice due to its waterproof qualities.
- Secure the Tarp: Lay the tarp over the damaged area, extending it past the edge of the roof to prevent water from seeping underneath. Secure it with ropes, bungee cords, or even nails if necessary, ensuring it’s tightly in place to withstand wind.
Covering Broken Windows
A broken window can be a security risk and allow the elements into your home. Here’s a quick guide to covering a broken window with a tarp:
- Clean the Area: Remove any loose glass shards carefully to avoid injury.
- Measure and Cut: Measure the window frame and cut the tarp to size, leaving some excess material to ensure full coverage.
- Secure the Tarp: Use duct tape or nails to secure the tarp over the window frame. If you have a canvas tarp, this can be particularly effective for interior windows as it provides some insulation and is less likely to flap in the wind.
Protecting Exposed Areas
In the event of structural damage, such as a hole in the wall or roof, a tarp can provide temporary protection:
- Inspect the Damage: Determine the size and location of the hole.
- Choose the Right Tarp: A heavy-duty canvas tarp can be beneficial here, especially if you need the area to breathe while still being protected from the elements.
- Cover and Secure: Drape the tarp over the hole, securing it firmly with ropes, nails, or other fasteners.
General Tips for Using Tarps
- Ensure Proper Fastening: Always make sure tarps are secured tightly to avoid them being blown away by wind.
- Check for Damage: Inspect tarps regularly for tears or wear, replacing them if necessary.
- Use Grommets: Utilize the grommets (reinforced holes) on the edges of the tarp for better securing options.
Conclusion
Tarps are an invaluable resource for emergency home repairs, providing a quick and effective way to mitigate damage until permanent repairs can be made. While poly and vinyl tarps are excellent for waterproofing and durability, canvas tarps offer unique benefits such as breathability and sturdiness.
By understanding how to properly use and secure tarps, homeowners can better protect their property from further damage during emergencies. Always prioritize safety, and consider having a variety of tarps on hand for different types of repairs.


