Table of Contents

As essential as ac units are, they aren’t impervious to issues.
Duct leaks rank high on the list of why your ac could be taking too long to cool your house. Therefore, it is of utmost importance to have routine maintenance checks and repairs to rectify any points of weakness in their early stages.
In doing so, you will enjoy lower energy costs and comfortable temperatures throughout the year — contact Anderson Air for all your ac servicing and repair needs.
Signs of an air duct leak include high monthly electricity bills, rooms never staying at a comfortable temperature, difficulty heating and cooling your home, and tangled up or dirty ductwork.
If you want to do the duct leak repair yourself, here are 11 steps that you can follow to find air duct leaks in your home.
Step #1: Get the necessary equipment
For a full inspection of the duct system, acquire a flashlight, rubber gloves, a digital camera, an incense stick, and any other materials you may need. Then emulate the guide below on how to check for duct leaks.
Step #2: Run your ac unit at full blast
Running your AC at full blast increases airflow, helping you locate the leaks faster.
Check your duct system for leaks as air passes through it. It is difficult to locate any leaks in your air ducts if your ac is not blowing air. So, to check for leaks, run your ac or entire HVAC system at full blast.
Step #3: Check for leaks
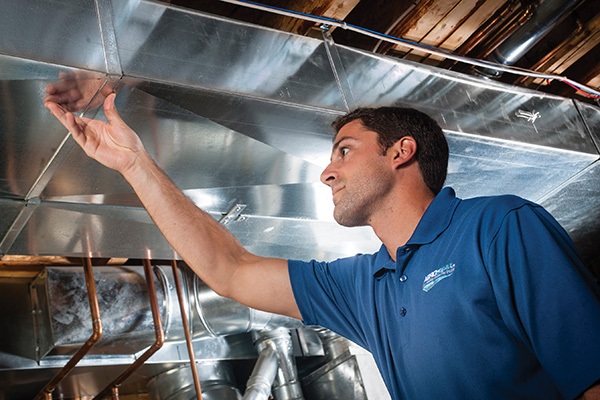
As the air runs throughout the ducts, inspect the ducts for any tears, points of weakness or noticeable holes. Mark the leaking areas with a washable marker or grease pencil. Continue doing this until you finish with the whole ductwork.
Step #4: Check for any spots with duct tape
Someone could have previously used duct tape to seal any leaks. But duct tape isn’t sufficient in sealing ducts for long periods of time. It loses its tightness over time. It’s more of first aid than a permanent duct leak sealer, which means that any area covered with duct tape will cause trouble again.
So remove the duct tape and mark these spots.
Tip: Let a professional HVAC technician repair your ducts. They use quality duct sealing materials that are more effective and durable, allowing them to offer permanent fixes to duct leakage issues in your home.
Step #5: Inspect the duct joints
Duct joints are areas where two air ducts meet and are one of the main parts of your HVAC duct system that are vulnerable to leaks and tears.
To check for leaks in duct joints, place your hand near or along the joints to feel for any air coming out or escaping from the joints. Also, run your hand along (over and under) other parts of the duct system to find any more leaks.
Step #6: Use mastic duct sealant to seal all duct joints
Before you continue inspecting other parts of the duct system, first seal up all the leaks you have marked so far.
Mastic duct sealant is great at fixing air duct leaks well — it’s water-soluble, is applied with a brush-like paint, dries within a short time, and lasts for a long period. Apply mastic to the leaking spot directly.
Step #7: Use a smoke pencil or incense
You cannot find all leaks by feeling your hands for escaping air or inspecting the ductwork for tears and holes.
Smaller leaks are much harder to find. To locate them, use a smoke pencil, incense stick, or something that produces smoke. Light the incense stick and pass it near the ductwork. When the smoke runs or comes across the leaks, it will be pulled into the air duct. Mark the area where the incense smoke is being pulled into the air duct with a grease pencil.
Step #8: Use a fog machine
You can also get/use a fog machine to locate any remaining leaks. After sealing up all visible leaks, use a fog machine to pinpoint the exact location of any remaining small leaks.
To do this, place the fog machine near your furnace or blower intake fan. When the fog is sucked into the furnace or fan, wait for it to come out of the cracks in the air ducts, showing you any remaining leaks. Seal up these leaks with mastic or foil-faced tape.
Step #9: Check for mold, wet spots, and torn pieces in your branch ducts
Branch ducts are usually found in your attic or basement. To inspect them for any leakages, use a flashlight to check for any wet spots/moisture, mold, or holes. Call your technician to rectify the situation if you see any of these things.
Step #10: Check your old ductwork in the attic
Ducts in the attic and other crawl spaces are prone to leakage issues. This is because rodents and other pests love hiding in these dark and warm spots, especially on the flex ducts. And in so doing, they scratch through the liners into the air ducts, creating holes, huge leaks, and very unsanitary conditions.
So, you need to inspect and examine them yourself physically. Check for any sagging air ducts and flex ducts that have separated from their metal connections.
Step #11: Rely on a reputable HVAC company
It is difficult for you to locate all your HVAC ductwork systems. And even if you do, the damage may be severe and might call for your entire ductwork to be replaced. A professional is the best way to figure out how to find air duct leaks and seal them up for good.
HVAC contractors use modern and efficient technology to inspect, locate and repair any leaks in your air duct system. For example, some technicians use infrared technology to make the invisible air escaping from the ducts visible. And in so doing are able to pinpoint all the small and larger points of leakage within a short time and repair them.
Conclusion
Knowing how to locate air duct leaks is vital if you have an HVAC system.
Whether you find leaks or not, call an HVAC technician to repair the ductwork, clean them and insulate them. A healthy ductwork system ensures a well-functioning air conditioner.


